Most steam showers that disappoint fail in the same place, and it is not the machine. The generator is a box you buy. The steam room is a room you build — and building it wrong is where the money goes.
The job, reduced to its parts, is this: turn a shower space into a sealed, sloped, vapor-proofed enclosure, then connect a generator to water, power and a drain. How hard that is depends almost entirely on when you do it. Planned into a remodel, it adds a few days and a few thousand dollars. Attempted on a finished bathroom without opening walls, it barely exists as a project at all.
This is what actually happens on a job like this, in the order it happens, so you can finish reading with a clear answer to the only question that matters first: does your bathroom qualify.
The Short Answer
Converting an existing shower to steam typically takes 3 to 7 working days of on-site labor once materials are in hand, and runs roughly $4,000 to $12,000 all in depending on finishes. As part of a larger remodel, the steam portion adds a few days and a smaller increment over the normal bathroom budget. The electrical work almost always needs a permit. The enclosure work is the project; the generator is an accessory to it.
Retrofit vs. New Build: Two Very Different Jobs
New build or full remodel is the easy version. Every decision that matters — ceiling height, ceiling slope, waterproofing system, generator location, circuit capacity, glass — gets made before tile goes on a wall. The steam-specific work folds into the normal sequence of a bathroom job and the marginal cost stays modest.
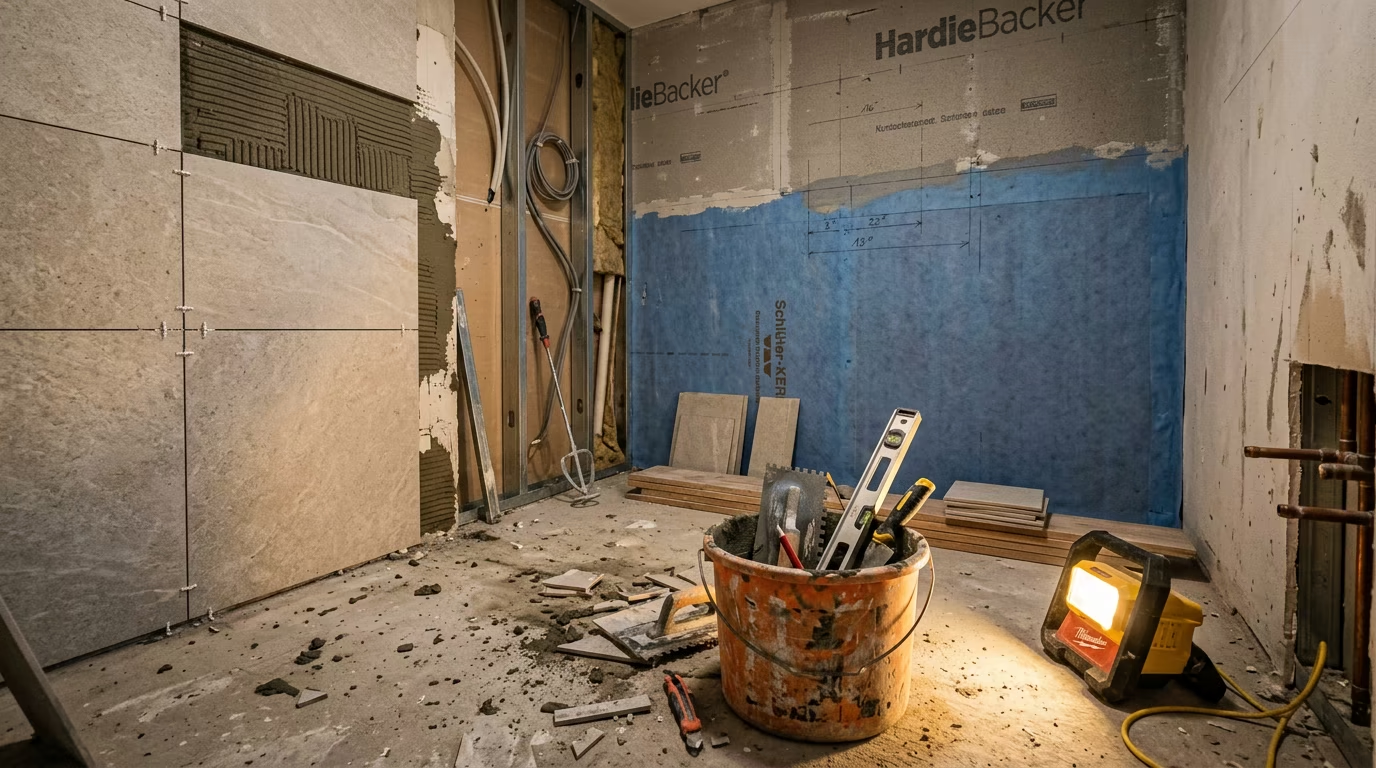
Retrofit means working backward. The existing shower comes out to the studs, because vapor-proofing lives behind the tile and cannot be applied from the front. The ceiling gets reframed or re-sloped. The door gets replaced with a sealed unit. The electrical panel gets checked and usually a new circuit run. By the end, the only original parts left are the footprint and the drain location.
Be honest with yourself about what a retrofit means: if the walls are not coming off, the room is not becoming steam-tight. A genuine no-demolition conversion is close to a myth. If demolition is off the table, the honest alternative is a portable steam shower setup rather than a built one — a compromise, but a real one.
Does Your Bathroom Qualify
Four questions decide it.
Footprint. You need a shower space of at least about 3 by 3 feet, and realistically 3 by 4 or larger, because a steam shower without somewhere to sit misses the point of the thing. A bench wants 15 to 18 inches of depth. Around 4 by 5 feet seats two people comfortably.
Ceiling height. Seven to eight feet is the target. Higher ceilings add volume the generator has to fill, and steam stratifies up where nobody is sitting. A 9-foot bathroom ceiling usually gets a dropped steam ceiling over the shower.
Waterproofing state. Unless the shower was built for steam — almost none were — assume the existing waterproofing is not vapor-rated. Standard shower waterproofing stops liquid water. Steam is vapor, and it passes through barriers that liquid never could.
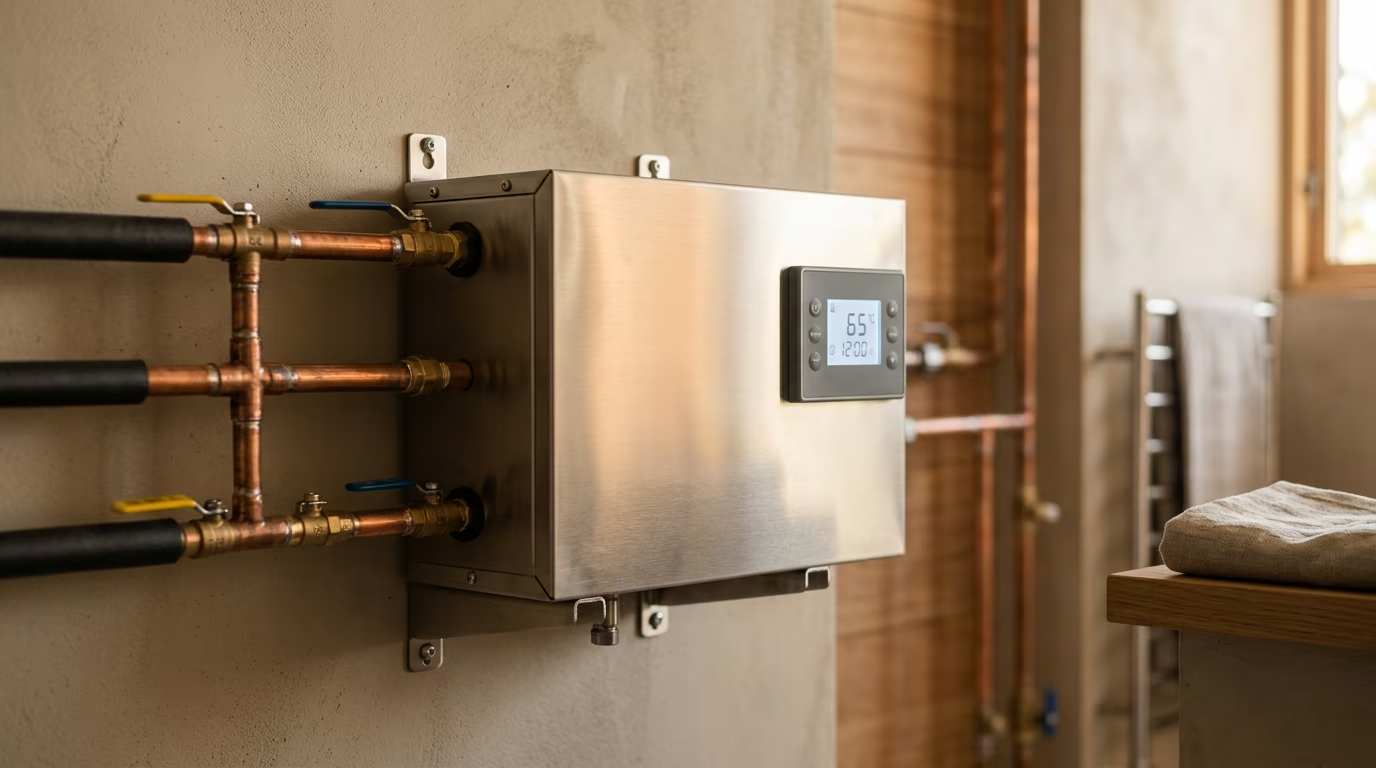
The panel. A 7.5 kW generator needs a dedicated 240-volt circuit at roughly 30 to 40 amps. Older homes on 100-amp service may be tight. An electrician’s site visit answers this for the price of a service call.
If the answers are footprint yes, ceiling manageable, walls coming off anyway, and panel capacity available — your bathroom qualifies.
The Enclosure: Making the Room Steam-Tight
This is the heart of the job, and the difference from an ordinary tiled shower is one word: vapor.
A regular shower contains liquid water that falls and drains. A steam shower contains vapor that presses into every joint, every grout line, every unsealed penetration, and condenses inside whatever it reaches. An enclosure that is merely waterproof will quietly feed moisture into your wall cavities for years.
The build sequence: cement board or foam backer over the studs — never standard drywall anywhere in the enclosure — then a vapor-retarding membrane rated specifically for steam across every surface, ceiling included. Not every waterproofing membrane is steam-rated; the product data sheet has to say so. Then every interior surface gets a finished, non-porous face: tile, stone or solid surface, with sealed grout. No painted drywall, no wallpaper, no wood trim inside the room.
The bench gets built at this stage too — either framed and tiled with the room, or a slatted removable seat — sloped a fraction toward the drain so condensate does not pool where you sit.
The Ceiling: Slope and Height
Steam rises, hits the ceiling, and condenses. What happens next is a design decision you make once and live with daily.
On a flat ceiling, condensate gathers into droplets and falls — cold, on your head, every few minutes, for the entire session. It is the single most-cited annoyance in badly built steam showers, and it is entirely avoidable.
The fix is a sloped ceiling, commonly 1 to 2 inches of fall per foot of run. Condensate forms on the slope, migrates to the low edge, runs down the wall, and drains with everything else. You never feel it. The slope is built during framing or formed in the substrate, and it costs almost nothing at that stage — which is why its absence in a finished room is so irritating.
Keep the ceiling at or under 8 feet even if the bathroom is taller. A dropped ceiling over the steam zone reduces the volume you pay to fill and keeps the steam where the people are.
The Door: The Usual Failure Point
A standard frameless shower door leaks vapor freely — at the hinges, at the strike, at the threshold gap, over the top. In a steam shower, every one of those leaks delivers moisture to surfaces outside the enclosure that were never built to receive it.
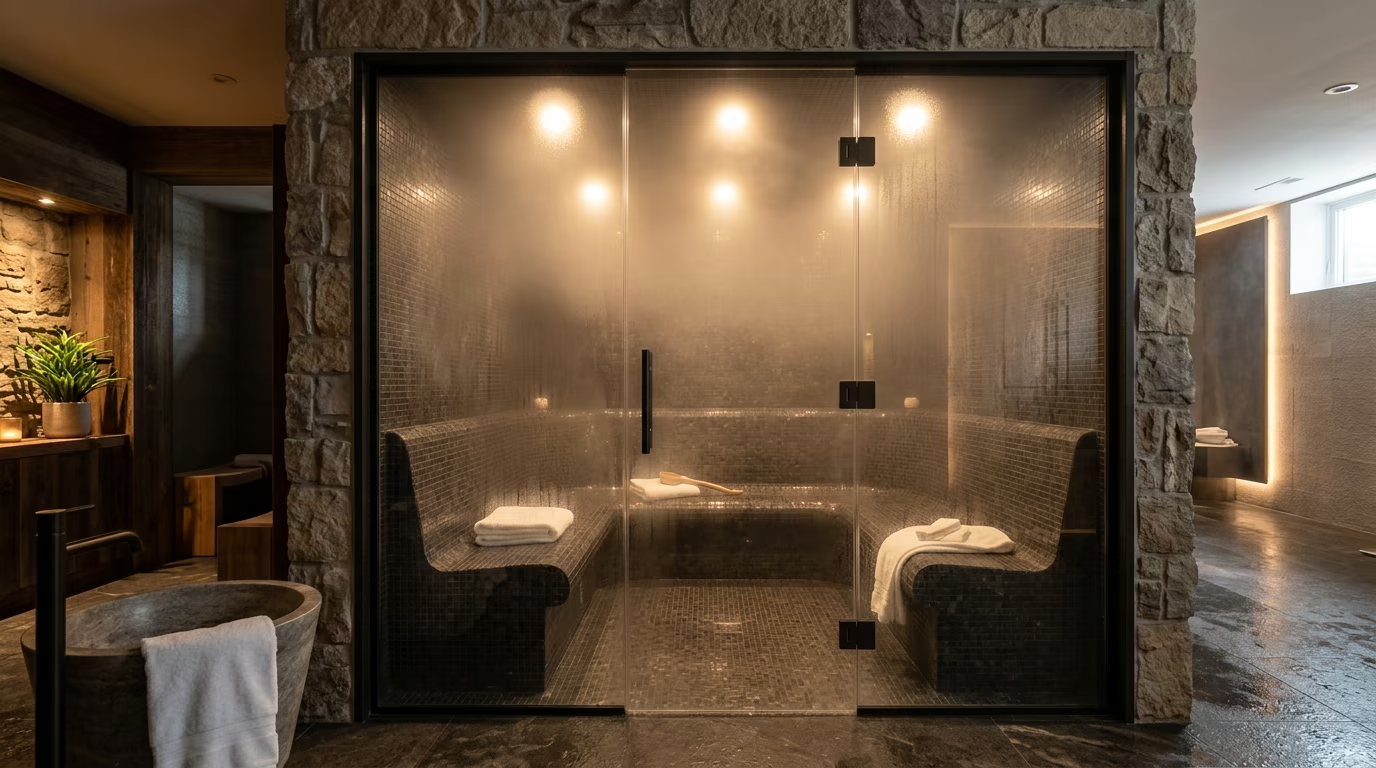
A steam-rated door is a different product: full gasket seals around the perimeter, a sweep at the threshold, and hardware designed to close against the seals. Many add a transom panel above the door — fixed, or operable so you can vent heat and let the room dry after use without propping the door open.
The door is custom glass territory. It gets measured after the tile is finished, fabricated over one to three weeks, and tempered. It is frequently the schedule driver for the whole project, and it is not a place to economize: where steam escapes, the point of the room escapes with it.
The Steam Head: Placement Rules
The steam head is a small fitting, but its position has hard rules, because the steam leaving it is essentially at boiling temperature.
Low. The head mounts roughly 6 to 12 inches above the floor, per the manufacturer’s instructions. Steam rises on its own; starting it low distributes it evenly.
Away from the bench. The plume is scalding at the orifice and cools over distance. A head beside or below the bench puts bare skin in that plume. It goes on a different wall, with the bather well clear of the direct path.
Away from bare feet and the door. Not underfoot where someone stepping in contacts it, and not beside the door where opening it dumps the room’s steam into the bathroom.
Most heads include a small reservoir for a few drops of eucalyptus or other oil — a nearly free feature worth having.
Plumbing and Electrical Rough-Ins
Rough-in is when the invisible decisions get made, and it happens before the walls close.
The generator location is decided now — a nearby closet or cabinet, the vanity, the attic above, or the basement below, within the steam line’s limit of roughly 25 feet. From that location the job needs: a cold water line to the unit, a drain path for its flush discharge, and the insulated copper steam line running to the head location, sloped so condensate drains rather than pooling.
On the electrical side, a dedicated 240-volt circuit is run to the generator location, sized to the unit — commonly 30 to 60 amps depending on the kilowatt rating — with the protection the manufacturer and local code require. This is permitted, inspected work in almost every jurisdiction.
The principle to hold onto: at rough-in, every mistake costs a hundred dollars. After the tile, the same mistake costs thousands. Measure the steam head wall twice.
How Long the Job Takes
| Project type | Typical on-site time | What drives it |
|---|---|---|
| Conversion of an existing shower | 3–7 working days | Demo, re-waterproof, re-tile, glass measure |
| Bathroom remodel with steam added | 2–4 weeks total | Steam adds a few days to a normal remodel |
| New build or addition | Folded into the build | Planned from framing, adds little time |
The steam generator shower installation itself is quick — a plumber and an electrician can typically commission the unit in half a day once the room and rough-ins are ready.
The schedule driver is usually the custom glass door, which cannot be measured until tile is complete and then takes one to three weeks to fabricate. Plan for the room to be usable as a shower during that gap and unusable as a steam room.
What It Costs
Ranges, because finishes swing the total enormously:
- Conversion of an existing shower: roughly $4,000 to $12,000 all in — enclosure rebuild, door, generator, controls, electrical.
- Steam added to a remodel: the increment over an ordinary bathroom renovation is typically a few thousand dollars, since demo and tile were happening anyway.
- The generator portion alone — machine, control, steam head, installation — typically lands around $2,000 to $5,000.
Natural stone, full-height glass and premium fixtures push any of these upward, and stone also pushes the generator size upward with it. For the full line-by-line budget, see the cost breakdown in our steam room cost guide.
Permits and the DIY Question
Permits. The electrical work needs a permit nearly everywhere. Plumbing work often does. Moving walls or the drain adds a building permit. Inspections happen at rough-in and at final. Unpermitted 240-volt work is the kind that surfaces during a home sale, and insurers take a dim view of fires traced back to it. Budget the fees — typically modest — and call the building department before work starts, not after.
DIY, honestly. A capable DIYer installing a steam shower can do real portions of this job: framing the slope, hanging backer board, even setting tile. But the waterproofing for steam is markedly less forgiving than for a regular shower — vapor finds errors that liquid never would — and the consequences arrive inside your walls, years late. The generator mounting and water connections are DIY-reachable; the 240-volt circuit is electrician work in most places, legally and sensibly.
The realistic split for a skilled homeowner: build the room, hire the utilities. If that sentence made you hesitate, hire the room too. Steam finds every shortcut eventually, and it is patient about it.
Common Questions
Can I add steam to my existing shower without rebuilding it?
Rarely, and be skeptical of anyone who says otherwise. Vapor-proofing lives behind the tile, so a genuine conversion means opening the walls. Portable steam units exist for the no-demolition case, but they are a different product with a different experience.
How long does a full installation take?
Three to seven working days for a straight shower conversion once materials are on hand, plus one to three weeks of waiting for the custom glass door. As part of a remodel, it folds into the remodel schedule and adds a few days.
Do I really need a special door?
Yes. A standard frameless shower door leaks vapor at every seam. A steam-rated door has full perimeter gaskets and a threshold sweep, often with a transom above. It is the most common failure point in the whole build.
Can two people use a steam shower at once?
Yes, if the room is built for it — roughly 4 by 5 feet or larger with two seats, and a generator sized to the larger volume. Decide this before the walls close, because the bench and the sizing both follow from it.
Does a steam shower need its own drain?
The enclosure uses the ordinary shower drain. The generator’s flush cycle needs a drain path as well, which is planned at rough-in — gravity or pumped, depending on where the unit sits relative to the drain.
Will it work on an exterior wall or in a cold climate?
Yes, with attention. Exterior walls need proper insulation behind the vapor barrier, and sizing charts add volume for cold surfaces, which can move you up a generator class. Neither is a reason to abandon the plan.
Keep Reading
- Steam Shower Generators: Sizing, Placement and What Actually Matters — The machine itself: kW sizing, placement and features.
- What a Steam Room Really Costs — The full budget, line by line.
- Spa Bathroom Ideas — Design directions for the room around the steam.